Read Time 3 Minutes
Hi! If you want to learn how to read chord diagrams on the guitar and use those chords to start playing songs, you’ve come to the right place.
What follows is a complete series of lessons on the basics of:
- Reading guitar chord diagrams
- Learning the most common and useful chords
- Understanding chord names (what’s the difference between a Cm7 and a C7?)
- Inventing new chords and figuring out their correct musical names
- And—best of all—using those chords to play songs and write your own progressions
If you can get your hands on a guitar, and if your fingertips are tough enough, you can sit down with this guide over a single weekend and be good enough to play a simple song by Sunday night. Isn’t the internet great?
Here I’ve taken great pains to be accurate and comprehensive, so total newcomers to the guitar can have a truly seaworthy guide. And as I’ve mentioned above, this guide is unique in that it won’t just teach you chords; it’ll also teach you how to use those chords to write your own songs.
Let’s jump in.
What’s a chord?
If you’re a total newcomer to the guitar, the first thing you should know is that a chord is just two or more musical notes played simultaneously. Unlike the saxophone, flute, human voice, or other melody instruments, the guitar is specifically designed to be able to play chords. This is done by pressing certain combinations of strings down against certain frets on the fingerboard, then strumming the strings with the free hand.
Guitarists use chord diagrams to learn chords from each other and write down ideas for later reference.
[note: click to enlarge any images below]
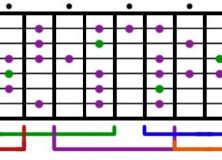
Check it out: here’s a picture of a blank chord diagram next to a guitar fretboard.
Now here’s a picture of a chord diagram that actually has a chord on it.
An “X” above a string means that you don’t strum that string.
Black dots represent the notes that make up the chord. If a dot appears inside of the fretboard diagram, put a finger where each dot should be. If a dot appears above the diagram, as we see above, you don’t need to use a finger at all—that string is played open, meaning you’ll strum it without fretting any notes. Since two of the dots in the diagram above are open strings, only one finger is required for this chord.
You’ll see some chord diagrams in the lessons ahead that have some white dots as well:
The white dots are add-on notes that can be used to make the chord sound richer and fuller. Technically, you’d still have a “C” chord if you just played the black dots, but in the case of this particular chord the add-on notes are almost always used; this gives it a richer, fuller sound.
These white notes aren’t arbitrary; they’re chosen according to the secretive, arcane, forbidden formulas of chord construction (which I will teach you later in this series). The white notes shown above are notes you can add on without changing the essential quality of the chord—add one of those notes, or both, and you’ve still got a “C” chord. Once you know more about how chords are constructed, you could easily change this chord to a “Cmin”, “C7”, or any other chord quality you like. For now, though, I just want you to be clear that those white dots have logic behind them; I’m not just choosing them by throwing darts at the diagram.
Alright! Now you know how to read chord diagrams. We’re ready to start making some actual music.
Join me in the next lesson and I’ll teach you five basic chords that you can use to learn and play hundreds—nay, thousands—of songs.


